00 Enter the room
Create a new Databricks environment and open the MigrationRoom dashboard.
Outcome
MigrationRoom is running against migration_demo.tpch, ClickHouse targets
migration_demo, and the dashboard is ready to drive the migration.
Clone MigrationRoom
export WORKSHOPHOUSE_DIR="$(git rev-parse --show-toplevel)"
git clone https://github.com/ClickHouse/MigrationRoom "$WORKSHOPHOUSE_DIR/../MigrationRoom"
export MIGRATIONROOM_DIR="$(cd "$WORKSHOPHOUSE_DIR/../MigrationRoom" && pwd)"
Everyone in this workshop starts with a new Databricks environment. MigrationRoom's
Terraform creates a serverless workspace, connects it to Unity Catalog, and provisions
the migration_demo.tpch workload. Terraform first needs an account-level Databricks
service principal: the non-human identity that Databricks OAuth exposes through a client
ID and client secret.
Create the Terraform service principal
You must perform these steps as a Databricks account admin in the account console. Do not use the settings page inside a workspace.
- In the left sidebar, open User management.
- Select the Service principals tab, then Add service principal.
- Name it
migrationroom-terraformand select Add. - Open the new principal's Roles tab and enable Account admin. MigrationRoom needs account-level permission to create the workspace and metastore-level permission to create the Unity Catalog catalog.
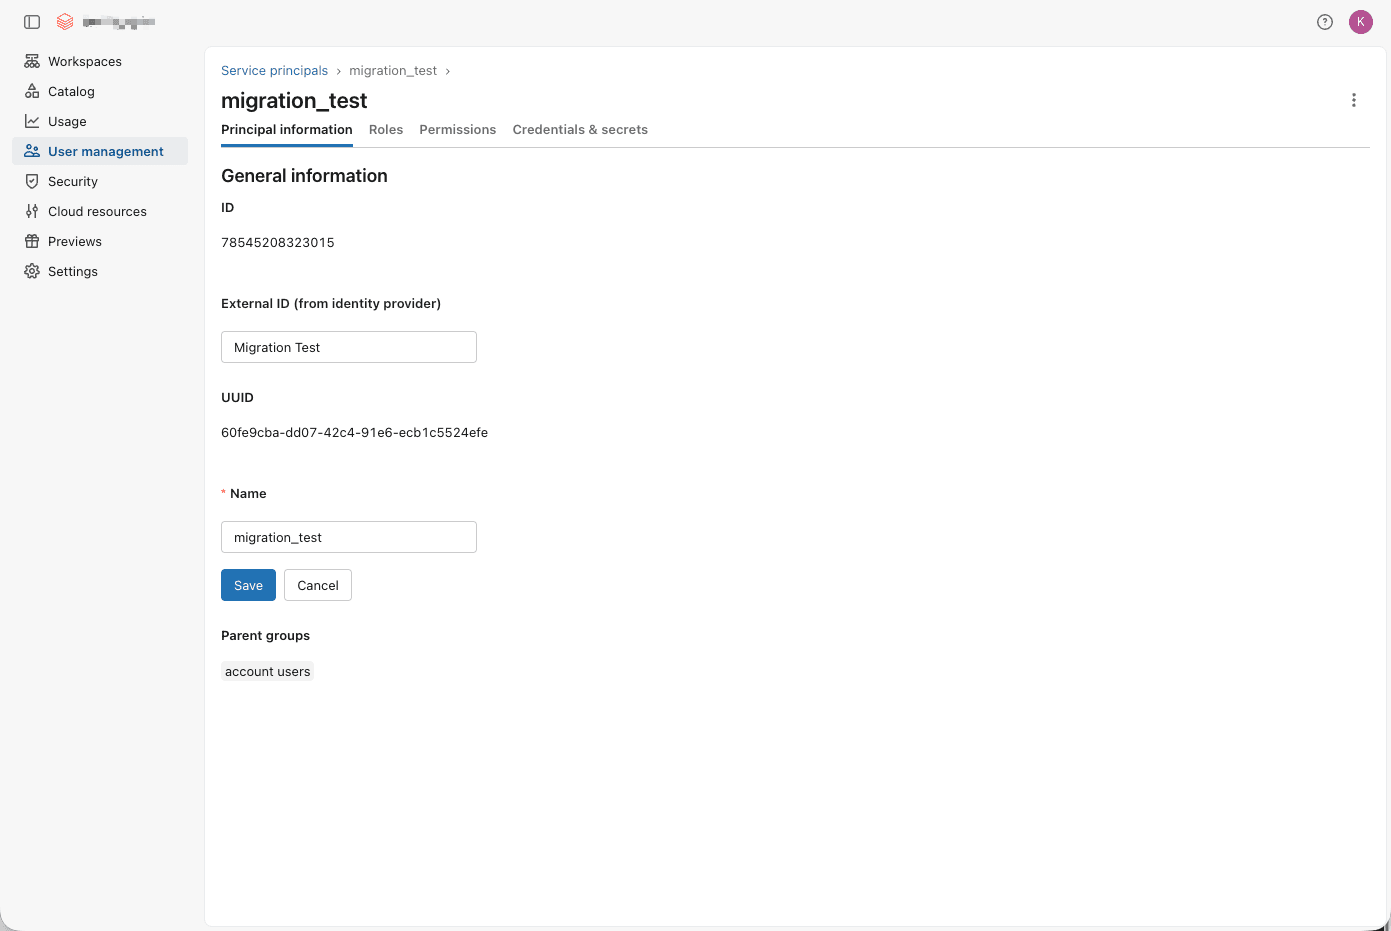
- Return to Principal information and confirm its details. The numeric ID
identifies the principal in account APIs; the UUID is its application/client ID.
Do not put the numeric ID in Terraform's
databricks_client_idfield.
Next, create the OAuth credential Terraform will use:
- Open Credentials & secrets.
- Under OAuth secrets, select Generate secret, choose a lifetime that covers the workshop, then generate it.
- Copy both Secret and Client ID before selecting Done. The client ID is the same value as the UUID on the principal-information page.
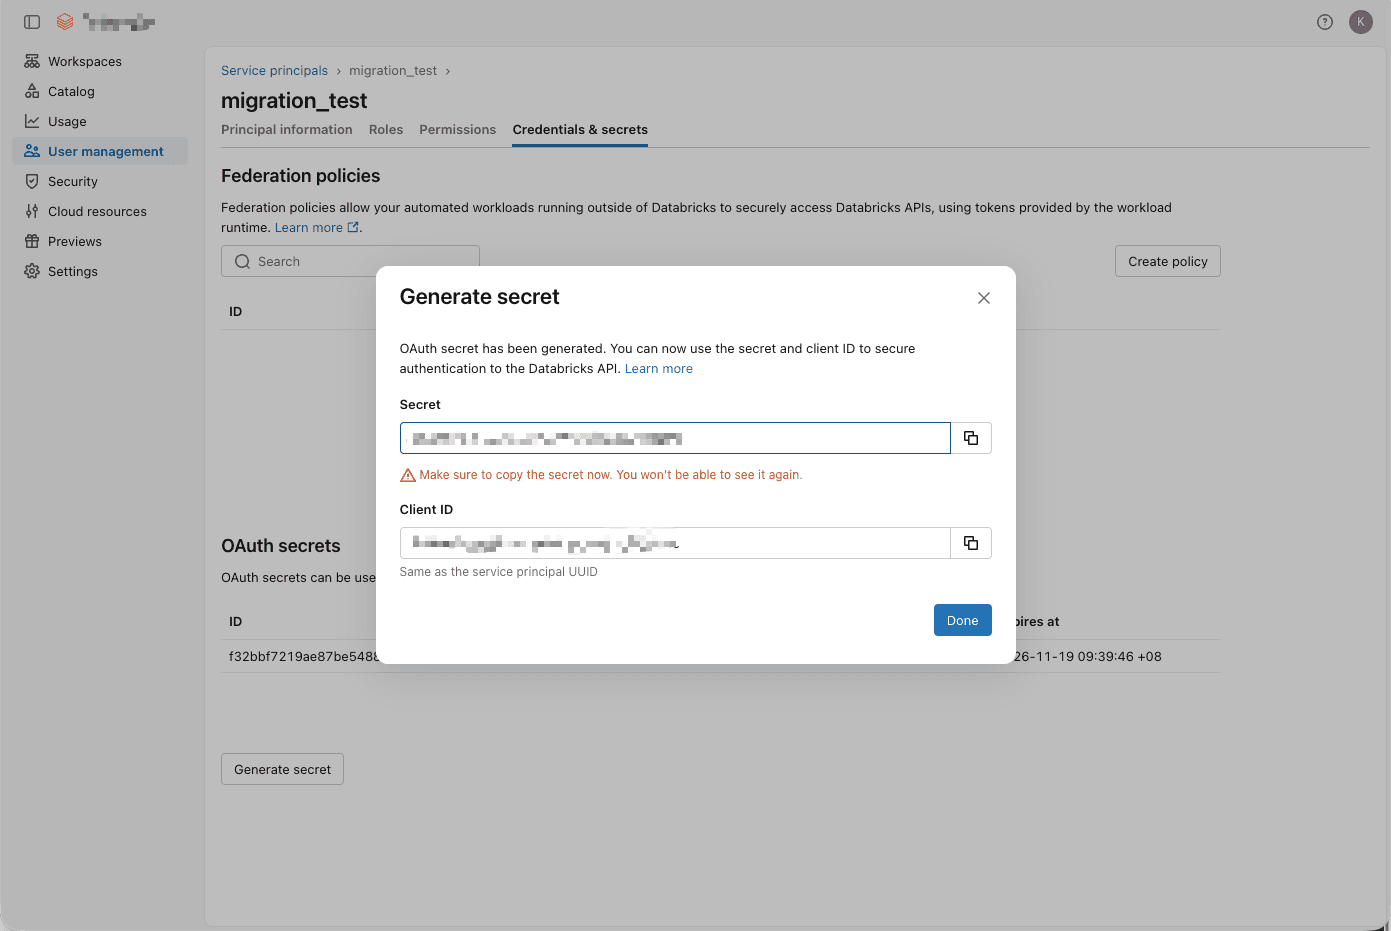
The OAuth secret is shown only once
Save it in your password manager or another workshop-approved secret store immediately. If you close the dialog without copying it, generate a new secret. Never paste the secret into chat, workshop evidence, screenshots, or a tracked file.
Finally, copy the Databricks account ID: in the account console, open the profile menu in the upper-right corner and copy Account ID. This is a separate account UUID; it is not the service principal's numeric ID, UUID/client ID, or your AWS account ID.
At this point you should have exactly these three values:
| Terraform field | Value from the account console |
|---|---|
databricks_account_id | Account ID from the upper-right profile menu |
databricks_client_id | Client ID from the generated-secret dialog (also the principal UUID) |
databricks_client_secret | One-time Secret from the generated-secret dialog |
Provision the new workspace
Create the local Terraform variables file in MigrationRoom. It contains a secret and must remain untracked:
cd "$MIGRATIONROOM_DIR/sources/databricks/terraform/workspace"
cp terraform.tfvars.example terraform.tfvars
Open terraform.tfvars in your editor and replace the three placeholders:
databricks_account_id    = "<account-id>"
databricks_client_id     = "<service-principal-client-id>"
databricks_client_secret = "<service-principal-secret>"
Keep create_metastore = false unless the account has no Unity Catalog metastore in the
selected AWS region. Then provision the new serverless workspace and demo objects:
cd "$MIGRATIONROOM_DIR"
make databricks-provision-workspace
If the apply reports that the workspace has no metastore, set
create_metastore = true in sources/databricks/terraform/workspace/terraform.tfvars
and run the command again. See MigrationRoom's
new-environment guide
for the resources created and teardown details.
When Terraform succeeds, append the generated read-only runtime settings to
MigrationRoom's ignored .env:
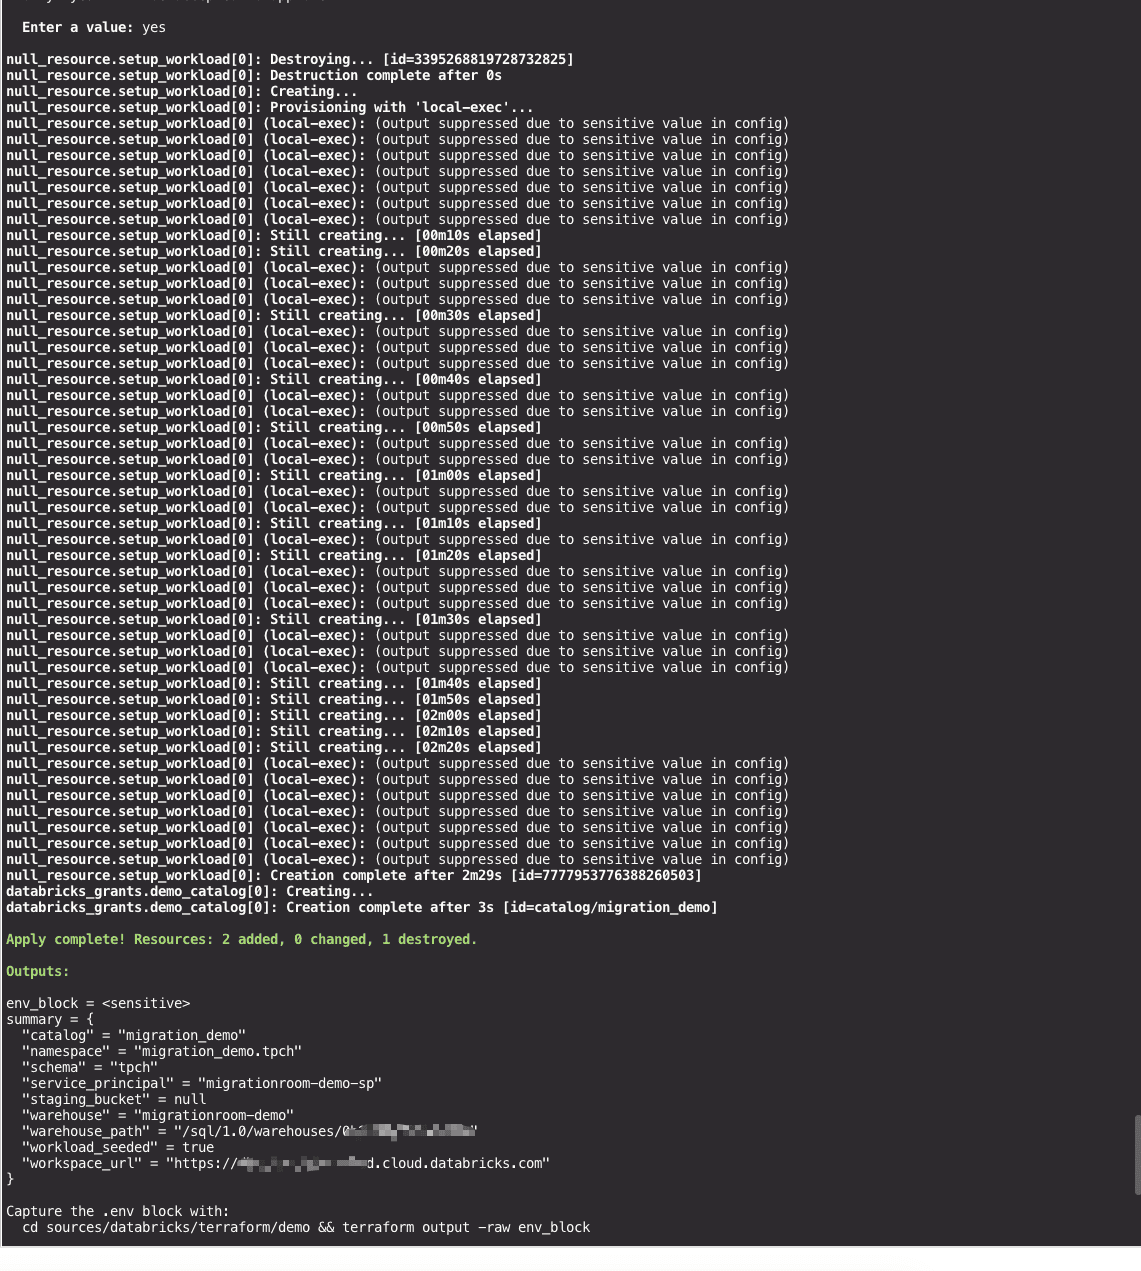
cd "$MIGRATIONROOM_DIR/sources/databricks/terraform/demo"
terraform output -raw env_block >> "$MIGRATIONROOM_DIR/.env"
The OAuth client secret is only a provisioning credential. The workshop runtime uses
the read-only identity Terraform creates. MigrationRoom's runtime contract is
DATABRICKS_HOST,
DATABRICKS_HTTP_PATH, DATABRICKS_TOKEN, and
DATABRICKS_NAMESPACE=migration_demo.tpch, plus the CLICKHOUSE_CLOUD_* target values.
Before launch, add the workshop ClickHouse Cloud connection and configured LLM-provider
values to MigrationRoom's ignored .env as described in its root README. Do not display
that file in a screenshot or paste it into chat.
Launch MigrationRoom
cd "$MIGRATIONROOM_DIR"
make up-databricks
docker compose ps
Wait until the dashboard, migration runner, Databricks MCP, ClickHouse tools, and chat services are healthy. From this point onward, the dashboard and its chat pane are the workshop control plane. You do not run the Python migration scripts yourself; clicking a step sends the correct prompt to the agent, which invokes its tools for you.
Open https://localhost/dashboard/. MigrationRoom uses a self-signed certificate for local development, so Chrome may show this warning:
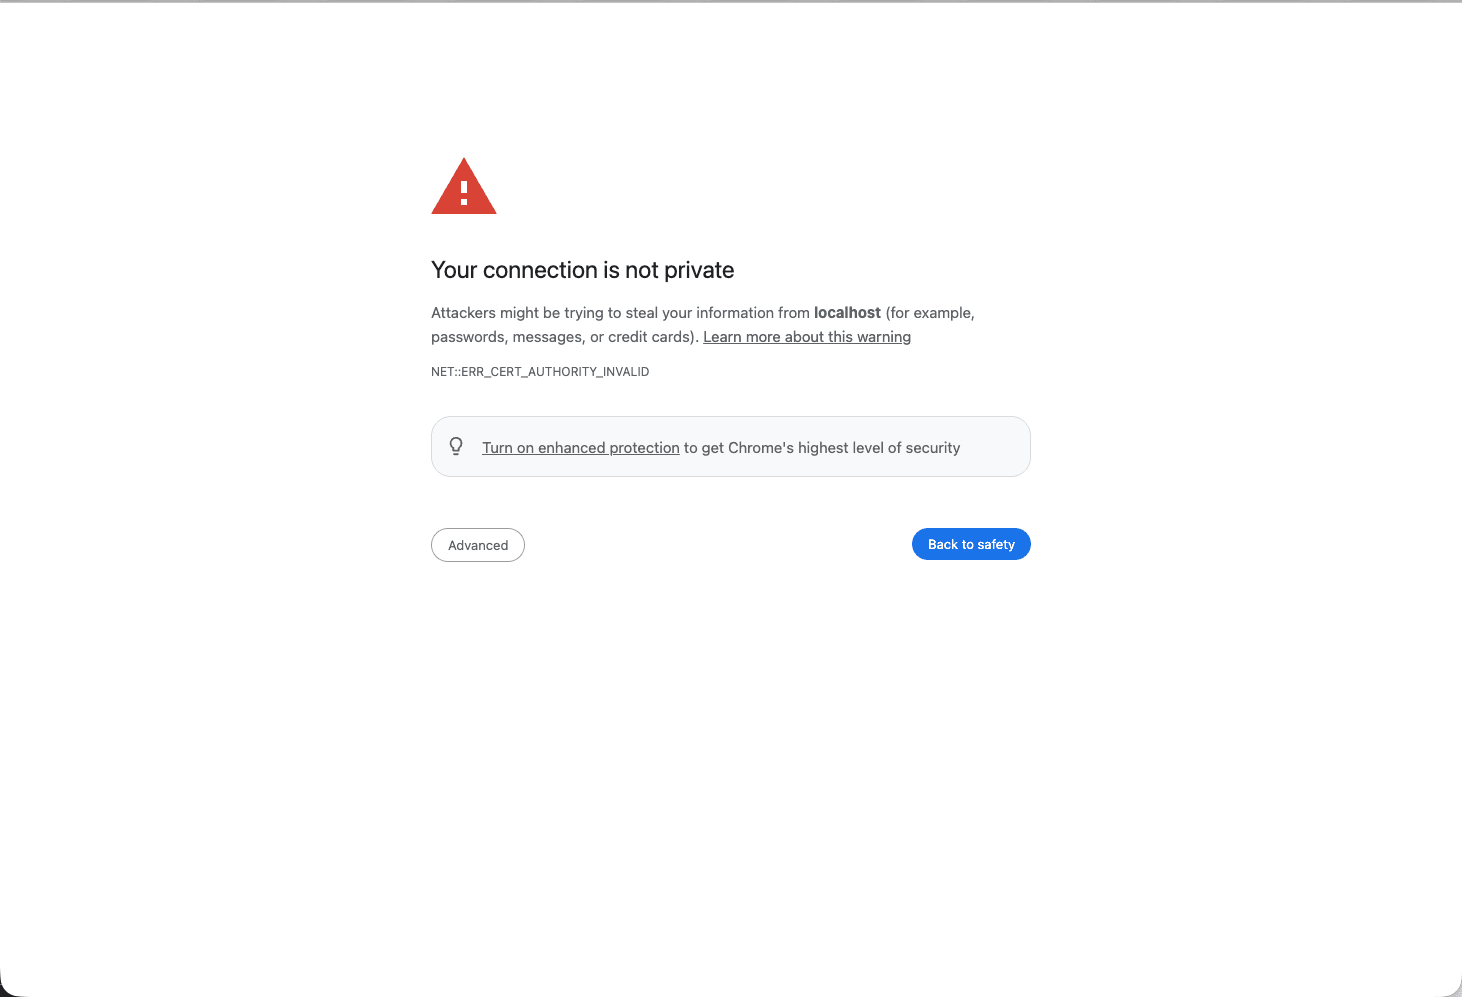
Select Advanced, then Proceed to localhost (unsafe). Do this only when the
address bar is exactly https://localhost; never bypass a certificate warning for a
remote hostname.
Set up the dashboard
In the left-hand Setup panel:
- Select Databricks as the source.
- Select
migration_demo.tpchas the source database. - Open Edit · OLAP and confirm that the Databricks analytical query pack is loaded.
- Under Conversation, choose New conversation unless you are intentionally resuming the workshop.
- Confirm that the chat header says Databricks → ClickHouse Cloud and all six step cards are visible.
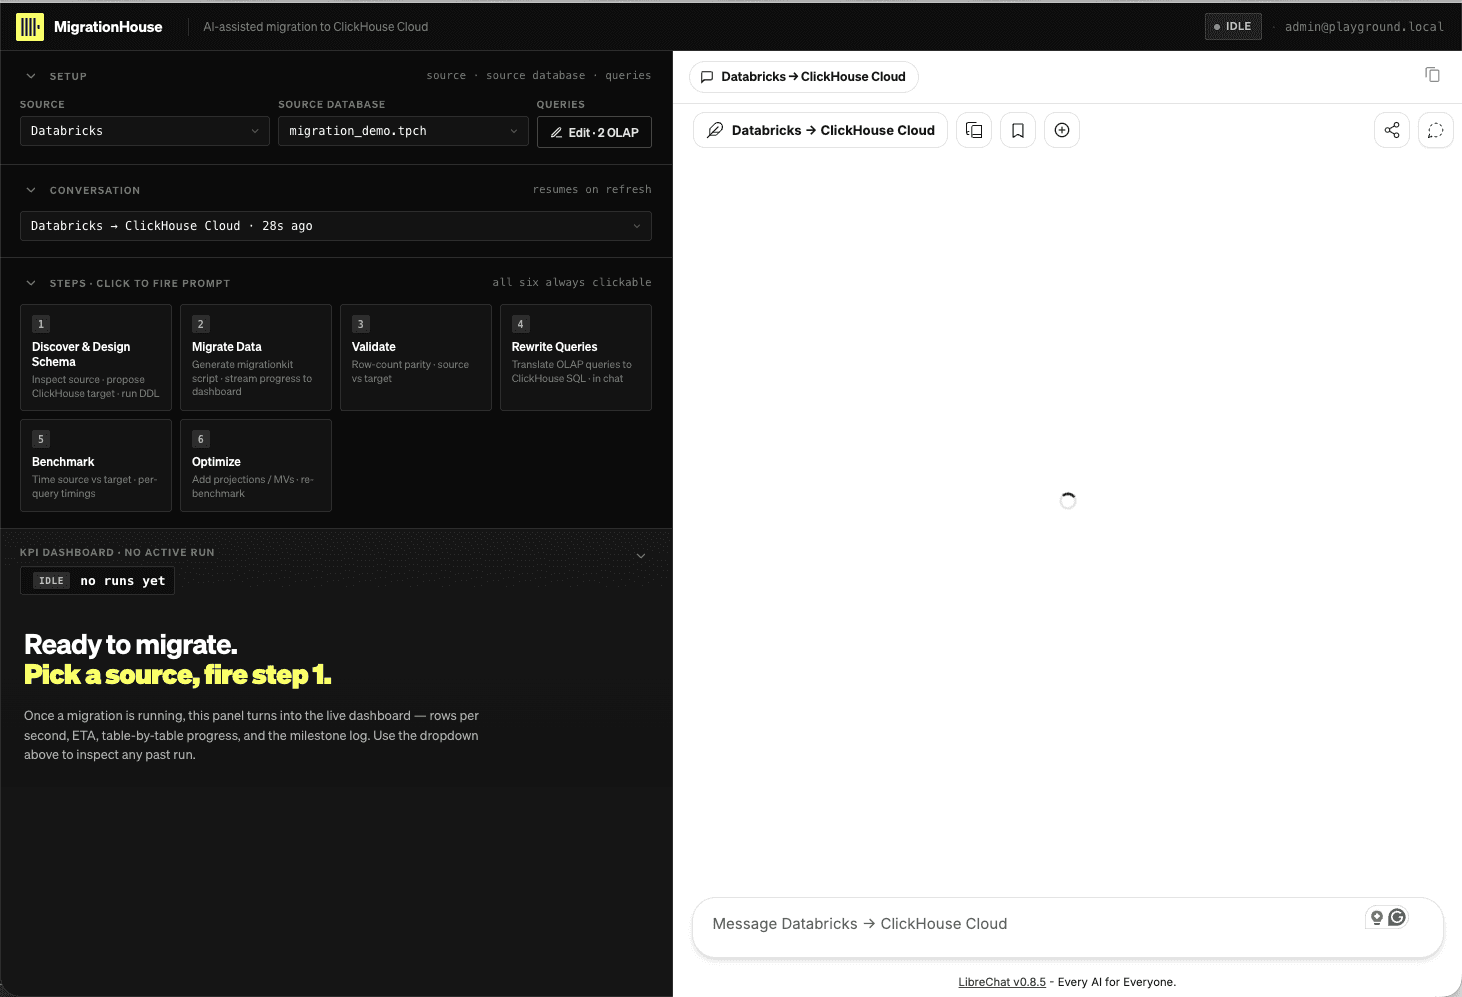
UI-first workshop
Use the six step cards and chat pane for discovery, schema creation, migration, validation, query rewriting, benchmarking, and optimization. Terminal commands appear only for provisioning, starting services, and safe teardown—tasks the dashboard does not own.
Readiness gate
- The account-level service principal has the Account admin role.
- Account ID, client ID, and client secret were entered in untracked
terraform.tfvars. -
make databricks-provision-workspacecompleted for the new environment. - The runtime identity is read-only.
- Every required Docker Compose service is healthy.
- The dashboard source is Databricks and database is
migration_demo.tpch. - Databricks → ClickHouse Cloud is selected.
- The OLAP query pack and all six step cards are visible.
Continue to 01 Establish the source baseline.